
Hello! Today, I'd like to share the building process for the Flash Cowl I made. It's based on the CW series Flash. I don't follow the series, but my brother does so I thought it'd be nice to make something "not-Marvel" for a change. First of all, a big big thanks to my Mom and Dad, for getting me the things I needed for these DIY projects ^_^.


I printed out the template from this YouTube channel, Cyera, and adjusted the size a bit. One problem I had was the Eva Foam was too thin. I needed 5mm, and it was 2mm. So I ended up cutting out two templates for every part.
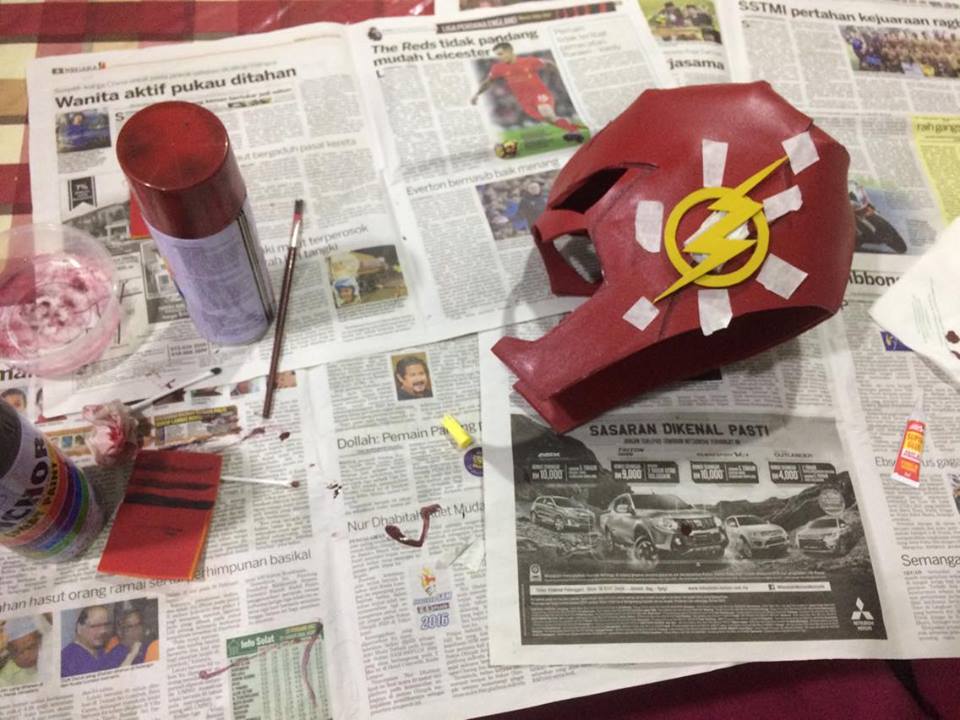
Once I was done, I used a bunch of masking tape to put the cowl together for testing.

Yeah, I looked more like a bad Iron-Fist cosplay. Turned out, the nose piece and chin strap prevented me from putting it on without damaging it. In a nutshell, it was small. So, i proceeded to making some adjustments, and finishing the cutting process.

With these projects, it is important that you have patience. DIY work can get tedious real fast, so my advice is that you make something you're really passionate about. Sometimes you feel like you just want to paint it, and call it a day. But if you take your time with what you're doing, it'll turn out a lot better.

I stuck all the parts together with superglue. Oh yeah, please wear gloves when working with superglue. Unless you wanna accidentally glue your fingers together...like i did...
I left the chin strap unglued, and stuck an extra piece for the nose bridge, for fitting purposes. There may be moments where you have to improvise. For instance, the ear pieces were too soft, and the didn't look nice when spray-painted. So i got an empty tissue box, to make em more rigid.
 |
| "free advertising" |
Now there was a small problem. I used a Sharpie, to trace the template, and mark stuff. I thought i could just spray-paint over it. Well...I was wrong. Sharpie goes right through spray-paint. I was frustrated. But, giving up wasn't the answer. So i spent the next few days, trying to find a way to tackle this. I tried using toothpaste and nail-polish remover, but it just made smudges. Finally, i found a combination that worked.

Oddly enough, it was deodorant of all things, that was the most effective at removing those sharpie stains. The cowl did took a toll though. Bits and bobs were scratched and messy. But oh well, what are you gonna do right? I bought undercoat spray-paint, and covered up the whole cowl.
I also used Wall-filler, to cover up some cracks and holes, mainly the ones on the top. In the end, the undercoat helped to do way more than just covering the sharpie stains. It made the red spray-paint come on nicely and neatly, so the sharpie problem ade hikmahnya jugak :). After using sandpaper to smooth the parts covered in filler, it was time to paint!

Up there, that's my spray-paint setup. Be sure to wear a mask every time you do anything spray-paint related, because that stuff's toxic.
 |
| The results of covering the top part with filler. Paint came on real neatly too. |
 |
| Had to mix some spray-paint, and hand paint some details, to make the cowl pop out more. |

 |
| Hi, my name is Barely Allen |
